Things to Remember
- The FLIR MD625 is a thermal imaging camera that improves nighttime navigation and safety on sailboats.
- Correct installation is key to ensuring the best performance and lifespan of the FLIR MD625 system.
- Important tools for installation include a drill, screwdriver, and marine-grade sealant, among others.
- Accessories like mounting brackets and cable extensions might be necessary depending on your sailboat’s configuration.
- Integrating the camera with your navigation system needs careful planning and execution.
Introduction to FLIR MD625 for Sailboats
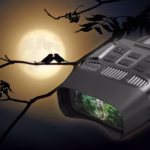
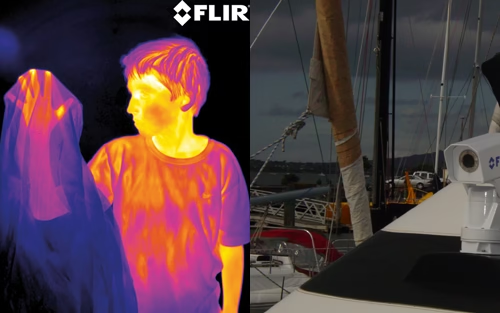
The FLIR MD625 is more than just a camera; it’s a thermal imaging wonder built specifically for marine conditions. Both experienced and novice sailors will find this tool invaluable, especially when navigating in low-light situations. It uses thermal imaging technology to provide clear visibility, even in total darkness. This ability transforms the sailing experience, making it safer and more enjoyable.
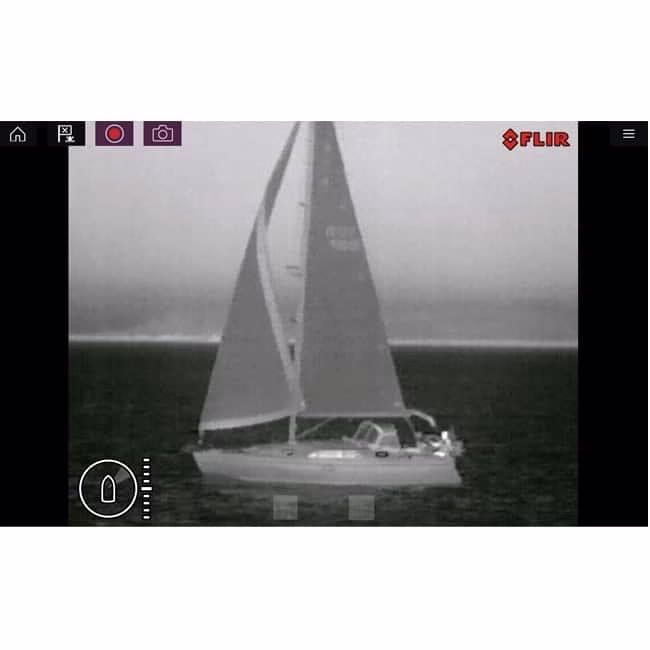
Thermal imaging operates by sensing the heat that objects give off and converting it into a visual representation. This means it doesn’t depend on visible light, so it’s ideal for use at night or in foggy weather. Consequently, the FLIR MD625 is capable of picking up obstructions, other boats, and even sea creatures that could be hidden from view.
Why Sailboats Need Thermal Imaging
Thermal imaging is a game-changer for safety on sailboats. When you’re out on the water, conditions can shift in an instant, and being able to “see” in the dark is a lifesaver. It helps you navigate through crowded waterways or tight channels where there might be obstacles.
In addition to that, the FLIR MD625 provides a sense of security. It’s comforting to know that you have another pair of “eyes” keeping an eye out for potential dangers, which can alleviate anxiety and enhance your sailing experiences. It’s not just about preventing crashes; it’s also about identifying wildlife or other attractions that you might not have noticed otherwise.
Getting to Know the FLIR MD625 System
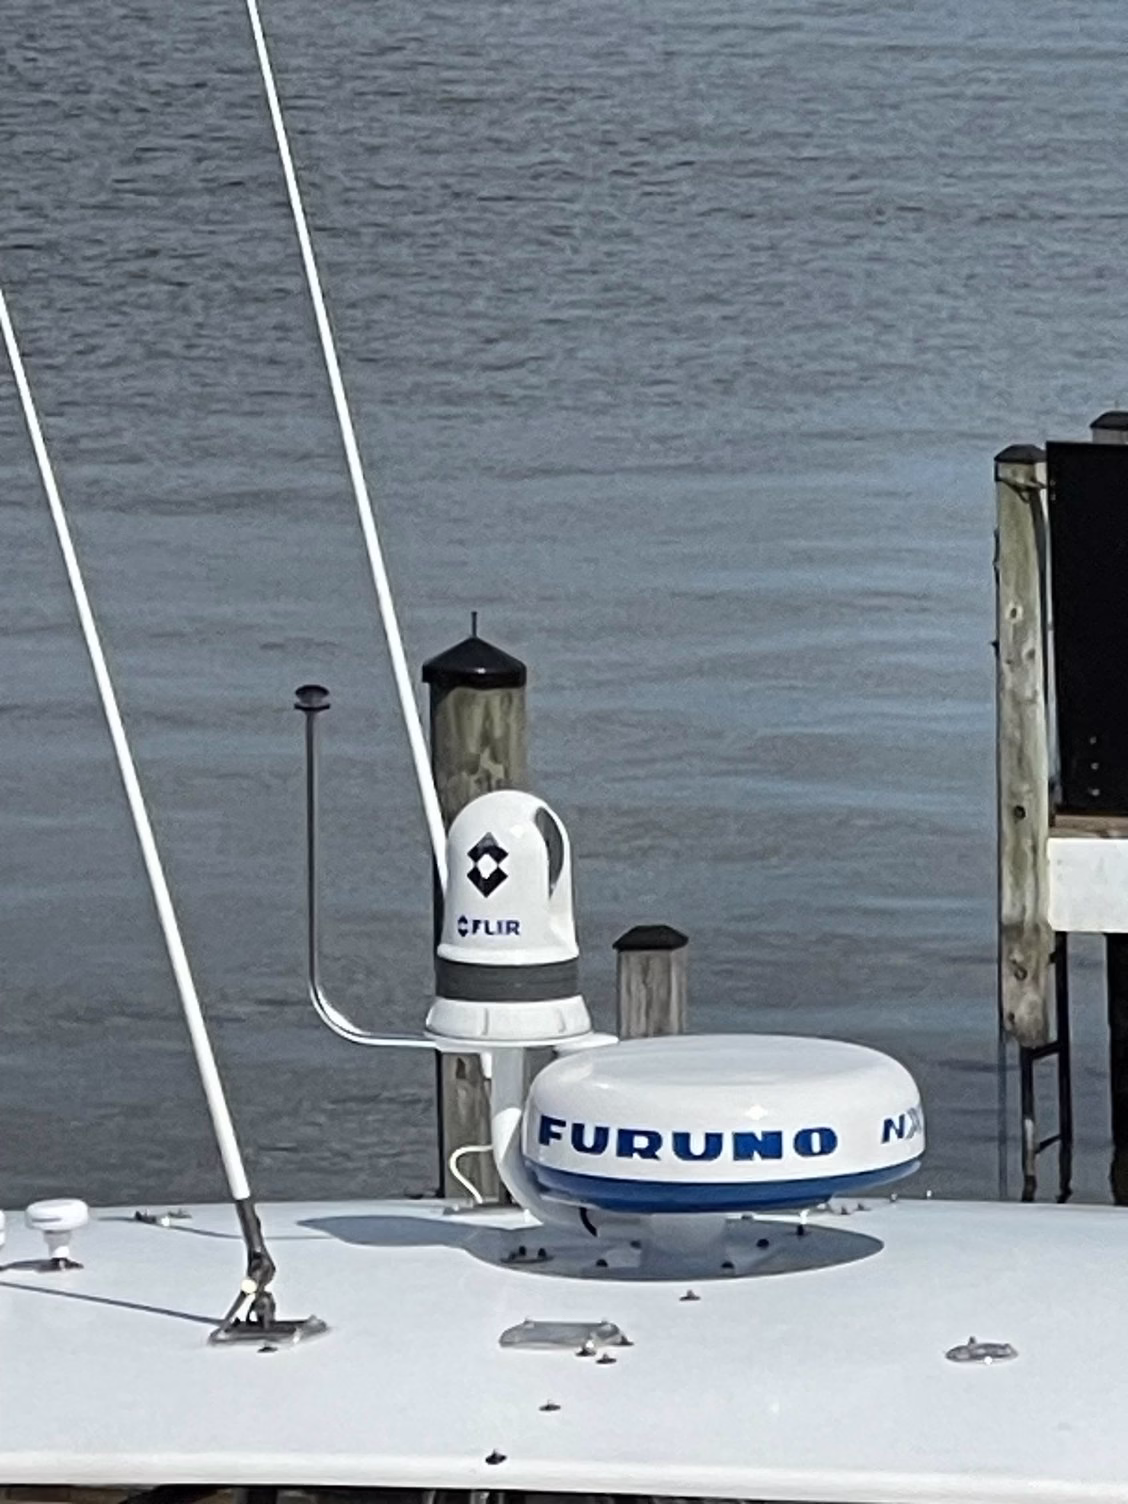
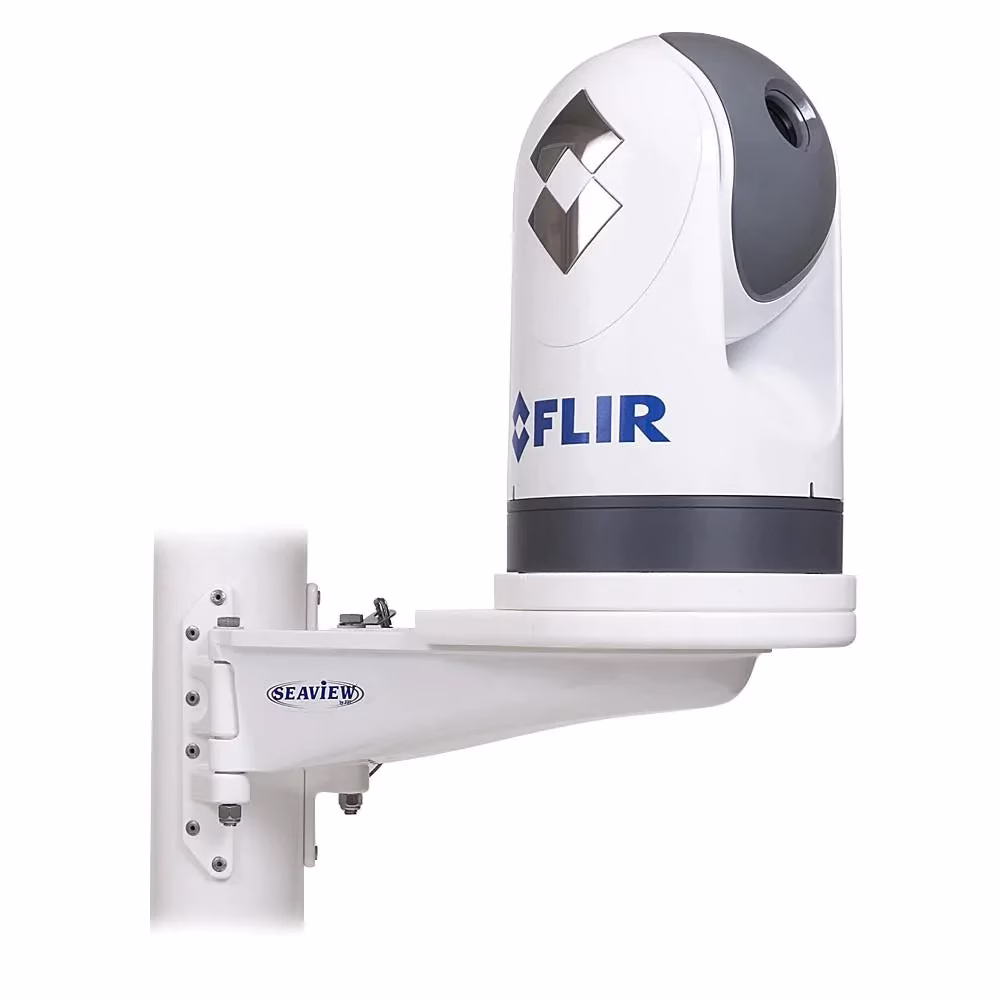
The FLIR MD625 system is made up of a number of important parts. The heart of the system is the thermal imaging camera, which is sturdy and built to endure tough marine conditions. The camera is typically placed on a high area of the sailboat, like the mast or radar arch, to give a broad view.
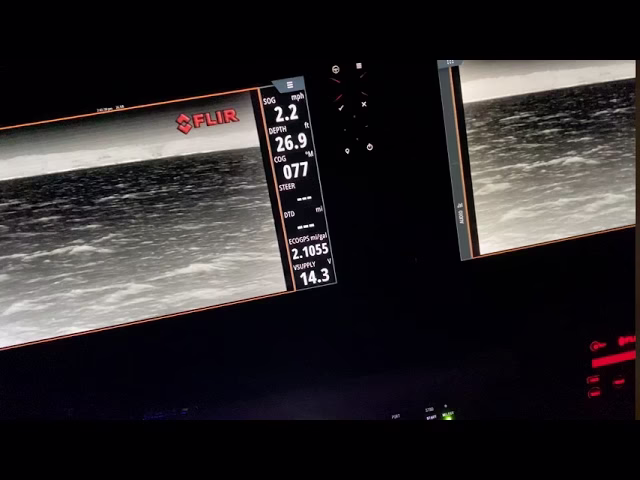
Moreover, the system comes with a display unit, usually incorporated with the boat’s current navigation system. This incorporation enables the thermal images to be seen together with other vital navigational data, offering a complete view of your environment.
Understanding the components of the FLIR MD625 and how they work together is key to getting the most out of it. This knowledge will come in handy during installation and troubleshooting, ensuring you get the most bang for your buck.
The Importance of Correct Installation
It is vital to correctly install the FLIR MD625 for a number of reasons. Firstly, if the system is not installed correctly, it may not work as it should, leading to unreliable performance when you need it most. Secondly, if the installation is not done correctly, it could void warranties or cause damage that could be expensive to fix.
So, making the effort to properly set up the system isn’t just about adhering to the instructions—it’s about guaranteeing safety and dependability. By getting it right the first time, you can prevent future problems and sail with peace of mind.
What You’ll Need to Install Your FLIR MD625
Before we get started with the installation, let’s make sure you have all the tools and materials you’ll need. This will make the installation go more smoothly and quickly.
Tools You’ll Need
Here are the tools you’ll probably need for the installation:
- Marine-grade drill bits and drill
- A set of screwdrivers
- Wire strippers and crimpers
- Multimeter for testing connections
- Marine-grade sealant
Additional Accessories and Components
Depending on the specific configuration of your sailboat, you may need to purchase additional accessories. These may include:
- Mounting brackets suitable for your boat’s structure
- Cable extensions for longer runs
- Connectors and adapters for integrating with existing systems
Preparing Your Sailboat for Installation
Preparation is key to a successful installation. Start by identifying the best location for mounting the camera. Ideally, it should be high enough to provide a clear view but also accessible for maintenance. Once the location is decided, clean the area thoroughly to ensure a strong adhesive bond if you’re using sealant.
Following that, you should carefully plan out the cable routing. Avoid running cables near other electronic devices, as they can cause interference. Make sure to secure the cables with clamps or ties to prevent them from moving or getting damaged while you’re out on the water. This is a key step in keeping your installation neat and functional.
Placing the Camera on Your Sailboat
Proper placement of the FLIR MD625 camera on your sailboat is essential for the best performance. Ideally, the camera should be placed as high as possible, usually on the mast or radar arch, to provide the widest field of view. This location will enable the camera to cover a larger area and effectively identify any potential obstacles or hazards.
Before you attach the camera, make sure the place where you’re going to install it is steady and can carry the camera’s weight. Use a strong mounting bracket that can handle the hardships of the marine environment, like corrosion from saltwater and heavy winds. When you’ve found the perfect spot, mark the spots where you’ll drill the mounting holes and drill them carefully so you don’t harm the sailboat’s structure.
Hooking Up Cables and Power
After the camera is mounted, it’s time to hook up the cables and power. This part of the process requires a careful hand to make sure the connections are secure. Start by threading the camera’s cable through the sailboat, steering clear of potential interference like other electronics.
Ensure the cables are secured along their path with cable ties or clamps, so they don’t move or get damaged while you’re sailing. When you’re connecting the power supply, make sure your power source is stable and can provide the necessary voltage and current for the camera to work properly. You might find a multimeter useful to check the connections and make sure everything is working as it should.
Working With Your Navigation Systems
It’s crucial to connect your FLIR MD625 with your sailboat’s current navigation systems for smooth operation. This connection lets you see thermal pictures along with other navigational information, giving you a complete picture of your environment. Start by finding the input on your navigation display or multifunction display (MFD) that works with the FLIR MD625.
Adhere to the manufacturer’s guidelines when hooking up the camera to the display. You may need to use adapters or converters in this step, depending on how compatible your systems are. After you’ve made the connection, you can check the integration by turning on the systems and making sure the thermal images show up correctly on the screen.
Securing Waterproof and Weatherproof Protection
Considering the rough marine environment, securing the FLIR MD625 installation to be waterproof and weatherproof is important. Start by putting marine-grade sealant around the mounting brackets and cable entry points to stop water from getting in. This sealant serves as a shield against moisture, protecting the inside parts from harm.
Furthermore, make sure all cable connections and enclosures are properly sealed. Use waterproof connectors and junction boxes where needed for added protection. Regularly check the installation for signs of wear or damage and fix any problems quickly to keep the system in good shape.
Addressing Common Installation Problems
Even with the most careful installation, problems can occur. Knowing how to troubleshoot these common issues can save you both time and frustration. Here are some common problems and how to solve them.
Issues with Camera Connection
If your camera isn’t projecting any images, it could be due to a connection problem. Start by examining the cable connections to make sure they are securely and properly connected. Loose or disconnected cables are frequently the cause of connection issues.
Next, check the cables for any damage like fraying or cuts. If you find any, replace them right away to get everything working again. If you’re still having trouble, try the camera with a different display or system to make sure the problem isn’t with the display.
Issues with Power and Battery
If your camera is not working properly, the issue might be with the power. If the camera does not turn on, make sure the power supply connections are correct and the power source is giving the right voltage and current. You can use a multimeter to figure out if there are any problems with the power.
Moreover, make sure to check the battery connections if your sailboat is battery-powered. Make sure the battery is charged and in good condition. Change any corroded or damaged connectors to restore the power flow to the camera.
Problems with the Software and Display
The camera might not be working properly due to problems with the software or display. If the thermal images aren’t showing up as they should, check the software settings on the navigation display. Make sure you’ve chosen the right input source and that the settings are in line with the camera’s specifications.
It might be a good idea to check if your navigation system’s software or firmware needs an update. This can often fix compatibility issues. You can usually find the most recent updates and how to install them on the manufacturer’s website. If you’re still having problems after that, you might want to check the user manual or get in touch with customer support.
Getting the Most Out of Your
For you to fully enjoy your FLIR MD625, you must learn how to use it to its maximum potential. Start by getting to know the camera’s features and capabilities. This will help you use the system effectively under different sailing conditions.
It is important to keep up with routine maintenance to keep the camera in the best shape possible. Regularly clean the lens to make sure the images are clear, and check the system for any signs of wear or damage. Taking care of these issues as soon as they arise will help the camera last longer and continue to perform well. For more insights on maintaining your equipment, check out this guide on optimal performance care.
Lastly, think about connecting the FLIR MD625 with other sailboat systems, like radar or GPS, to improve your navigational skills. This connection can give a more complete picture of your environment, making your sailing journey safer and more fun.
Top Tips for Using Your Camera
To get the most out of your FLIR MD625, it’s important to know what it can and can’t do. First off, make sure the camera lens is always clean and unobstructed. A clean lens will give you the best picture quality, which is vital when you’re trying to spot potential dangers.
Furthermore, get to know your camera’s controls and settings. Take some time to play around with the different settings to see how they change the image quality. Adjusting the brightness, contrast, and other settings can help improve visibility in different conditions.
Tips for Regular Maintenance and Care
Keep your FLIR MD625 running smoothly by performing regular maintenance. Start with a thorough inspection of the camera and its parts for any signs of wear or damage. Make sure the mounting brackets and cables are secure and in good condition.
Use a soft, lint-free cloth to clean the camera lens and remove dust and debris. Stay away from using harsh chemicals that could harm the lens coating. If the camera comes into contact with saltwater, rinse it off with fresh water to avoid corrosion.
Make sure to regularly update your software to keep your system running at its best. Updates can help improve performance and fix any bugs or compatibility issues. You can find the most recent updates and instructions on the manufacturer’s website.

Combining with Other Sailboat Systems
Combining the FLIR MD625 with other sailboat systems can improve your overall navigation capabilities. Think about connecting the camera to your radar or GPS system for a more extensive view of your surroundings. This combination allows you to overlay thermal images with other navigational data, giving a more detailed picture of potential hazards.
Take a look at the user manuals for the FLIR MD625 and your other systems to make sure they’re compatible and set up correctly. If you need to, get a professional to help you integrate everything smoothly so you get the most out of your tech investments.
Wrapping Up
Mounting and operating the FLIR MD625 on your sailboat can greatly improve your safety and navigation skills. By adhering to the steps provided in this guide, you can guarantee a successful installation and take full advantage of this state-of-the-art thermal imaging system.
- Make sure the camera is set up in the right place for the best results.
- Fasten all cables and connections so they don’t get damaged.
- Keep the system in top shape by maintaining and updating it regularly.
- Connect the camera to other systems to help you navigate better.
Doing all this will make your sailing trips better and safer. The FLIR MD625 is a great tool that can give you peace of mind and make you feel safer when you use it right.
Enhancing Sailboat Safety and Performance with FLIR MD625
For enhanced safety and performance, use the FLIR MD625 in combination with other navigational tools. The integration of thermal imaging with radar, GPS, and traditional navigation methods can offer a complete picture of your environment.
Keep your gear in top shape by staying on top of maintenance. Regular checks and updates will keep your FLIR MD625 working its best, providing dependable service when you need it the most. This proactive approach will elevate your sailing adventures, making them safer and more fun.
Common Questions
Below are a few of the most frequently asked questions and their answers to help you get the most out of your FLIR MD625 installation:
How does thermal imaging enhance sailing in the dark?
By picking up on the heat given off by objects and turning it into a visual image, thermal imaging enhances sailing in the dark. This feature enables sailors to “see” even in pitch black conditions, spotting obstacles, other boats, and even sea creatures that would otherwise be hidden from view.
- Thermal cameras work by detecting heat rather than light, making them useful in conditions with little or no light.
- They can pick up objects that can’t be seen with standard cameras or the human eye.
- Thermal imaging increases safety by providing clear visibility at night.
Thermal imaging allows sailors to navigate with confidence and safety, even in difficult conditions. This technology is a great addition to the navigational toolkit of any sailboat.
Is the FLIR MD625 able to handle tough marine conditions?
Indeed, the FLIR MD625 was built to handle tough marine conditions. It’s constructed in a way that it can resist corrosion from saltwater, withstand strong winds, and face other environmental challenges. The camera’s casing is sealed to prevent water from getting inside, guaranteeing reliable performance even when the seas are rough. For detailed installation guidance, you can refer to the FLIR MD625 installation manual.
What are the typical software problems and how can they be fixed?
Typical software problems with the FLIR MD625 include issues with compatibility with navigation systems, outdated firmware, and incorrect settings. Here’s how to fix these problems:
Double-check that your navigation system works with the FLIR MD625 and that all your connections are solid. Keep the camera’s firmware up to date to get the most out of performance enhancements and bug fixes. Adjust the camera’s settings to fit your unique sailing conditions for the best image quality and performance.