Main Points
- For 24/7 home surveillance, night vision security cameras are a must, providing clear images even in total darkness.
- Regardless of the weather conditions, the Netvue Vigil Cam is weatherproof and perfect for outdoor use.
- The effectiveness of your security system can be greatly improved with proper installation and placement.
- With the Netvue app, which is available for both Android and iOS, connecting the camera to your network is a breeze.
- Regular maintenance and updates will keep your security system reliable and effective over time.

Improving Home Security with the Installation of a Netvue Vigil Cam
Securing your home is not just a luxury in today’s world, it’s a necessity. With the increase in home invasions and burglaries, having a strong security system is vital. This is where the Netvue Vigil Cam comes in. It’s not just about seeing what’s going on; it’s about the peace of mind that comes with knowing you can monitor your home day or night.
The Need for Night Vision Security Cameras
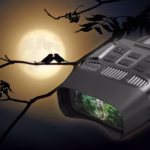
Picture having the ability to see with perfect clarity in the middle of the night, during the time when most crimes are prone to happen. This is the purpose of night vision security cameras. These cameras use infrared technology to provide a clear image, even in total darkness. This feature isn’t just for show—it’s a vital feature that can be the deciding factor in identifying trespassers and averting potential threats.
Why You Should Install Netvue Vigil Cam
Why should you go for the Netvue Vigil Cam? For starters, it gives you high-definition video, so you won’t miss a thing. Plus, it has state-of-the-art motion detection that sends alerts to your phone if it detects any movement. That way, you can respond immediately if anything fishy is going on.
What’s more, the camera is built to be able to stand up to the weather. It has an IP66 weatherproof rating, so it can take rain, snow, and heat and still keep going. This toughness means that you can count on it to last for years, giving you protection all the while.
A quick look at the installation process
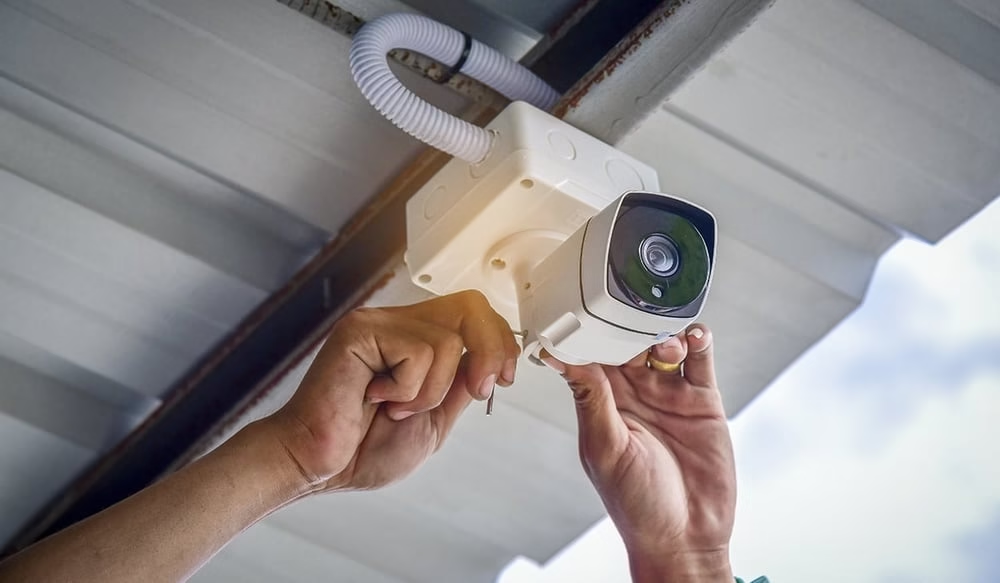
Installing the Netvue Vigil Cam is a breeze, but it’s critical to go through each step meticulously to guarantee the best performance. The process entails getting your tools ready, setting up the camera, mounting it securely, and tweaking the settings to meet your requirements. Let’s delve into the specifics.

“The Right Home Security System | Smart …” from sstsun.com and used with no modifications.
Getting Ready for Installation
Before you dive in, it’s important to get all your ducks in a row. This bit of prep work will save you from headaches down the road. Plus, knowing the ins and outs of your camera and finding the sweet spot for its location are vital to getting the most out of it.
Collecting the Needed Tools and Parts
Here are the basic tools you’ll need to begin:
- Drill and appropriate drill bits
- Screwdriver
- Mounting screws and anchors (usually included with the camera)
- Ladder (for reaching high places)
- Smartphone or tablet (for app setup)
Understanding Camera Specifications
Before installation, familiarize yourself with the camera’s specifications. The Netvue Vigil Cam boasts a 1080P HD resolution, which ensures clear video quality. It also features a 100° viewing angle, providing a broad field of view. Knowing these specs will help you choose the best location for installation.
Where to Place Your Camera for the Best Surveillance
Where you place your camera is crucial for good surveillance. You want to make sure your camera covers all the places someone might enter, like doors and windows. Also, you want to make sure it’s high enough that people can’t mess with it, but not so high that it doesn’t catch the important stuff.
Keep these tips in mind for the best placement:
- For the optimal viewing range, mount the camera 8-10 feet off the ground.
- Keep the camera away from direct light to prevent glare.
- Make sure the camera is in range of your Wi-Fi to maintain a steady connection.
Getting Connected and Setting Up
Now that you’re ready, it’s time to get your camera connected and go through the initial setup. You’ll need to download the Netvue app, set up an account, and connect the camera to your network.
Getting the Netvue App
The first thing you need to do to set up your Netvue Vigil Cam is to get the Netvue app. You can find it on the App Store or Google Play. You’ll use this app to keep an eye on and manage your camera.
Once you’ve downloaded the app, open it up and follow the instructions that appear on your screen to create a new account. This account will let you view your camera from anywhere and get alerts.
After you’ve created your account, the next step is to connect your camera to the network. This is an important step because it allows you to stream video in real time and receive alerts. Follow the instructions in the app to connect your camera to your Wi-Fi network.

Creating a Netvue Account
Before you can start using your Netvue Vigil Cam, you need to create a Netvue account. This account will be your gateway to monitor and manage your security camera from anywhere.
For instance: “Creating a Netvue account is a breeze. Just open the app, hit ‘Sign Up,’ and provide your email address and a strong password. You’ll get a confirmation email—click the link to confirm your account.”
After your account has been confirmed, you can sign in and start connecting your devices. The app will walk you through the steps to add your Netvue Vigil Cam, making sure it’s linked to your account for easy access.
By creating an account, you will be able to personalize your settings, get alerts, and watch live video. These features are crucial for ensuring your home’s safety.
Linking the Camera to Your Wi-Fi
With your account all set up, the next step is to link your camera to your Wi-Fi network. This link is necessary for streaming video and getting alerts.
Start by turning on the camera and making sure it’s within the range of your Wi-Fi router. Open the Netvue app and sign in to your account. Follow the instructions to add a new device, choosing ‘Vigil Camera’ from the list.
Example: “In the process of setting up, the application will prompt you to scan a QR code that’s located on the camera. This is how the camera will be linked to your account and network. Make sure that your phone is connected to the same Wi-Fi network that you’re planning to use for the camera.”
After you’ve connected the camera, you’ll see a live feed on the app. This feed lets you know that the camera is working properly and is ready to be mounted.
Setting up and Safeguarding the Vigil Cam
Now that the camera is hooked up and ready to go, it’s time to fix it in place. It’s crucial to mount it correctly to make sure it covers the right area and stays put, no matter what the weather.
Employing the Installation Template
Typically, Netvue cameras are equipped with an installation template. This tool simplifies the process of marking where holes need to be drilled for mounting. The template also guarantees that the camera will be properly aligned and securely attached.
Begin by placing the template against the wall or ceiling where you want to install the camera. With a pencil, mark the spots where you’ll drill. This is a critical step to ensure you drill in the right spots and avoid making extra holes.
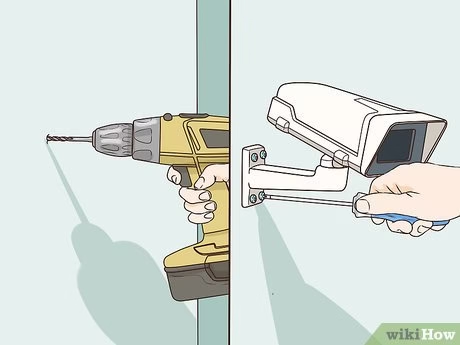
Helpful Hints for Drilling and Mounting
When you’re ready to drill, make sure to use the right drill bit for the job. Usually, you’ll want a masonry bit for brick or concrete and a standard bit for wood or drywall. Then, drill where you made your marks earlier. For more tips on improving your setup, check out this guide to setup and calibration.
Place the included wall anchors into the holes to guarantee a tight fit. Line up the camera’s mounting bracket with the anchors and secure it with the screws. Make sure the camera is steady and doesn’t shake. For optimal performance, consider following a precision care guide for your night vision security equipment.
“Security Camera System for a House …” from www.wikihow.com and used with no modifications.
Making Sure Your Connections are Weatherproof
Because the Netvue Vigil Cam is meant to be used outdoors, it’s crucial to make sure all connections are weatherproof. Doing this will keep your camera safe from moisture and other elements.
Wrap the power and network cables with weatherproof tape or sealant. Make sure you cover any exposed areas to prevent water from getting in. This protection is crucial for keeping the camera working over time.
Setting Up Camera Functions
Once your camera is installed and connected, you can start setting up its functions. These settings let you personalize how your camera works and reacts to various situations.
Adjusting the Sensitivity of the Motion Detection Feature
One of the most important features of a security camera is motion detection. This feature notifies you of any movement within the camera’s range, enabling you to react quickly.
Go to the motion detection settings on your Netvue app. You can adjust the sensitivity based on your needs. If you have an area where there isn’t much activity, you might need to increase the sensitivity. If there’s a lot of activity in an area, you might want to decrease the sensitivity.
Personalizing Your Alerts and Notifications
Getting alerts when you need them is key to keeping your home safe. With the Netvue app, you can choose how and when you get your notifications.
Configure alerts for particular times or days when you’re not at home. You have the option to choose between push notifications, emails, or both. This versatility ensures that you stay updated without being flooded with unnecessary alerts.
Checking Out Night Vision Settings
- Make sure night vision is turned on in the app settings.
- Tweak the infrared light intensity to get the best clarity.
- Try out the night vision by watching the camera feed in a dark setting.
Night vision settings are key to getting clear pictures when there’s not much light. Be sure the infrared lights aren’t blocked by anything.
Make sure to check the night vision feature often to make sure it’s working properly. This feature is very important for keeping an eye on things at night and can make your security system a lot better.
Operating and Maintaining the Camera
After the setup, routine maintenance is required to ensure your security system is at its best. This involves cleaning the camera lens, looking for firmware updates, and resolving any problems that may occur.
Maintaining your camera’s cleanliness and updating it regularly ensures that it continues to provide reliable security for your home.
Keeping Your Camera in Check
It’s important to regularly clean and inspect your Netvue Vigil Cam. This helps keep the camera working at its best and ensures that the footage is always clear and detailed.
- Use a soft cloth to gently wipe away any dust or debris from the camera lens.
- Make sure the mounting and connections are still secure by checking them.
- Look over the camera to see if there are any signs of wear or damage.
Doing regular maintenance can stop small issues from turning into big problems. Checking your security system once a month can help keep it reliable.
Moreover, maintaining a clean camera guarantees that the night vision function remains efficient, offering you sharp pictures even in dimly lit settings.
Ensuring Security with Firmware Updates
Keeping your Netvue Vigil Cam’s firmware updated is essential for both security and performance. Updates typically include fixes for known issues and enhancements to the camera’s operation.
Open the Netvue app and go to the settings menu to see if there are any updates. If there is an update, follow the instructions to install it. Regular firmware updates keep your camera safe from potential threats.
Dealing with Usual Problems
From time to time, you might run into some problems with your Netvue Vigil Cam. Some of the usual problems are connectivity issues, blurry images, or the camera not recording. Here are some tips on how to deal with these problems:
Should you find the camera is not connecting to Wi-Fi, make sure it is within the router’s range and that the network settings are accurate. If the images are blurry, inspect the lens for dirt or condensation. If the camera is not recording, make sure that the motion detection settings are on and correctly set.
Wrapping Up: Protecting Your Home Efficiently
Putting up a night vision security camera such as the Netvue Vigil Cam is a forward-thinking move to boost your home security. By adhering to the installation and upkeep steps detailed in this guide, you can make certain that your security system is not only effective but also dependable.
How Modern Surveillance Has Changed Home Security
With the advent of modern surveillance technology like night vision cameras, home security has taken on a whole new dimension. These devices give you a bird’s eye view of all the activities taking place around your home, offering a level of security that was previously unheard of.
“Night vision technology gives homeowners the ability to keep an eye on their property at all times, providing a sense of security no matter what time it is.”
Thanks to technological advancements, these cameras are now more budget-friendly and readily available, making them a feasible choice for any home.
Getting real-time alerts and watching live footage from anywhere globally gives you the feeling of always being at home.
Enjoy a Peaceful Sleep with Night Vision Cameras
Installing a night vision security camera is like having a watchful eye that never sleeps, always looking out for your home’s safety. It’s a deterrent for would-be intruders and a source of crucial evidence should anything happen.
Moreover, knowing that your home is safe lets you concentrate on other areas of your life without the perpetual concern of security risks.
Questions You May Have
These are some typical questions about setting up and using the Netvue Vigil Cam:
What’s the best height to put up the Netvue Vigil Cam?
The best height to put up the Netvue Vigil Cam is between 8 to 10 feet. This height gives a good overview of the area and also keeps the camera safe from tampering.
Does the Netvue Vigil Cam offer local storage options without a cloud subscription?
Indeed, the Netvue Vigil Cam does offer local storage options with the use of an SD card. This gives you the ability to save and access your recordings without having to subscribe to a cloud service, giving you more control over your footage.
What can I do to enhance the clarity of the camera’s night vision?
For enhanced night vision clarity, make sure the camera lens is free from dirt and is not blocked. You can adjust the intensity of the infrared light in the app settings for the best performance. Also, make it a habit to frequently check the night vision feature to make sure it works well in low-light conditions.
By following these steps, you can get the most out of your Netvue Vigil Cam and keep your home safe 24/7.
Keeping yourself updated and taking the initiative will give you the comfort of knowing that your home is safeguarded by the most recent security technology.